getting started with anemones
2/25/2018 Update: Thanks in large part to input from Jaime Sammons at Jayflora Designs in Fonda, New York, we made a few small changes to our anemone plan from middle-to late February. The sprouting corms quickly grew to fill the 50-cell trays-- faster than I thought they would. I pried a few up and saw how the roots were filling the space. We moved them to bulb crates lined with newspaper and filled with medium (per Jamie's rec.-- check out her blog post about anemones and ranunculus here.) There are about 20 anemones per crate, and they've been sitting under lights in the cellar. Their little leaves are starting to unfurl with watering every other day. Daytime temperatures are rising above freezing outside now, so I'm planning to transition the crates to life in a low tunnel with a layer or two of Agribon-50 soon, or at least part time while its warmer during the day time. That will free up some space in the cellar for the next round of seedlings. We're getting to the point where the first stock seedlings will need to be bumped up. We have two full 85 foot rows of stock (about 2,300 stems) started...
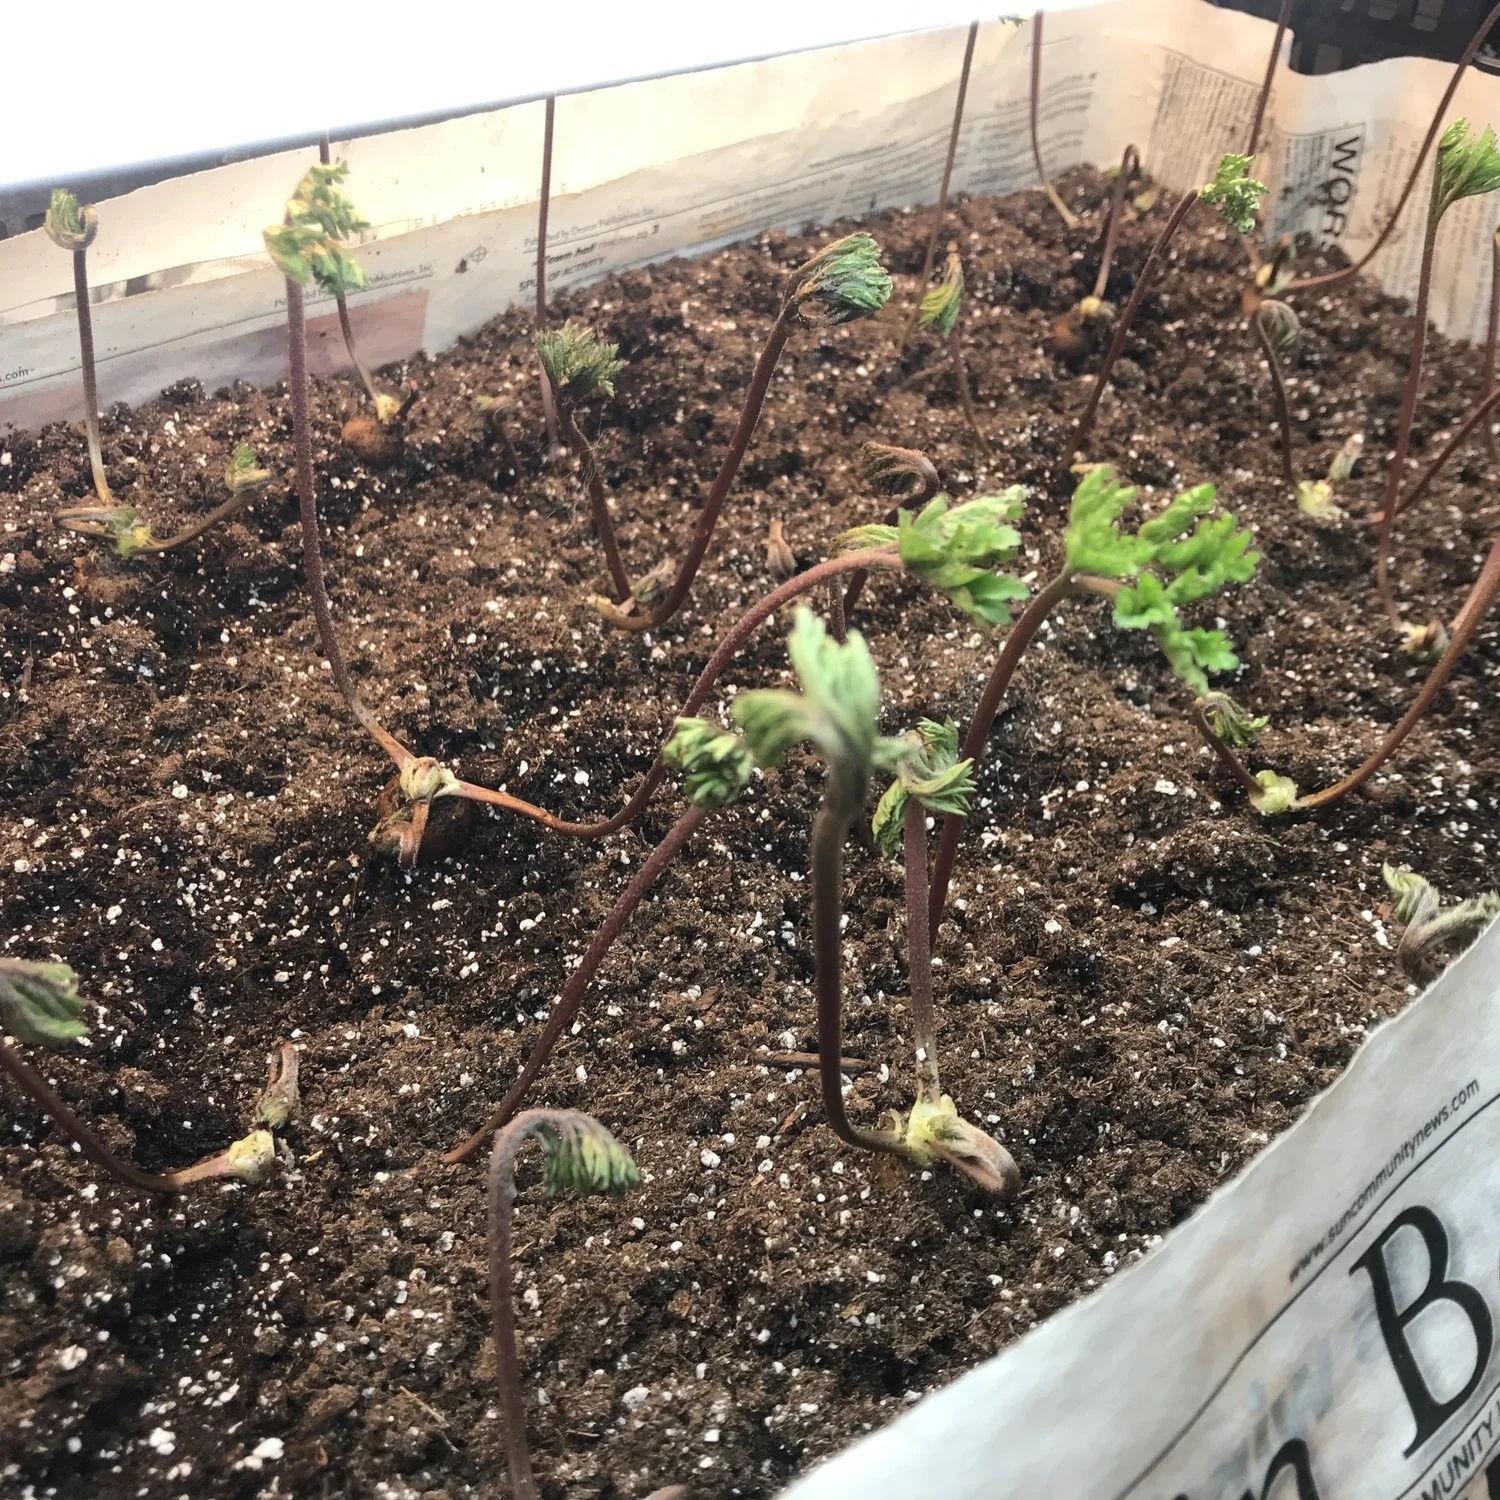
Anemones growing on in crates in the cellar. Photo taken 2/26/18. These plants first started (began their soak) on 1/29/18. They are just under one month old.
2/8/2018 We're growing our first anemones this year. That probably isn't exciting news to many of you, but for some reason figuring out the little buggers seemed like a scary thing to do. My vision was probably tainted by the cheap corms I bought at the supermarket one year. I potted them up per their instructions, but- not surprisingly- their instructions weren't very good. They all rotted. The missing step was an important (and easy!) pre-sprouting routine.
Julio Freitas of The Flower Hat in Bozeman, Montana told me that anemones are one crop I definitely need to grow. They love a cool summer and are good producers. (but they will flower earlier and overwinter in warm regions like zones 7-10!) So I read up on them a bit. Our bulb supplier in Holland provides some pretty lengthy instructions for preparing them. Those notes include treating them with this or that fungicide. That's not really my thing. Maybe it makes more sense for a larger commercial operation.
So, I followed the instructions from Floret and some of the tips I read from others- like Bare Mountain Farm, as best I could. I took my blue and black/white corms and put each variety in a bowl under a sink faucet. For a work day, I ran the faucet slightly at room temp. There were about 15-20 minutes when the blue ones were in hot water after my husband re-set the faucet improperly, but it doesn't seem to have affected them. Also- it's good to know that the corms sink to the bottom of the bowls, so you don't have to worry about them floating up over the edge.
When the anemone corms are done soaking, they'll be nice and plump. I dried the corms with a towel (to prevent an excess of moisture on them) and placed them in 1020 trays with dampened (but not really wet) germination mix. You want the mix to still be light. My mix comes from AM Leonard, and I'm really happy with it. It holds moisture well, but is still very lightweight. I've also seen others use vermiculite instead of germination mix for this step. I put 60 corms per tray. You could probably fit more, but I didn't want them to be touching each other, in case some started to rot.
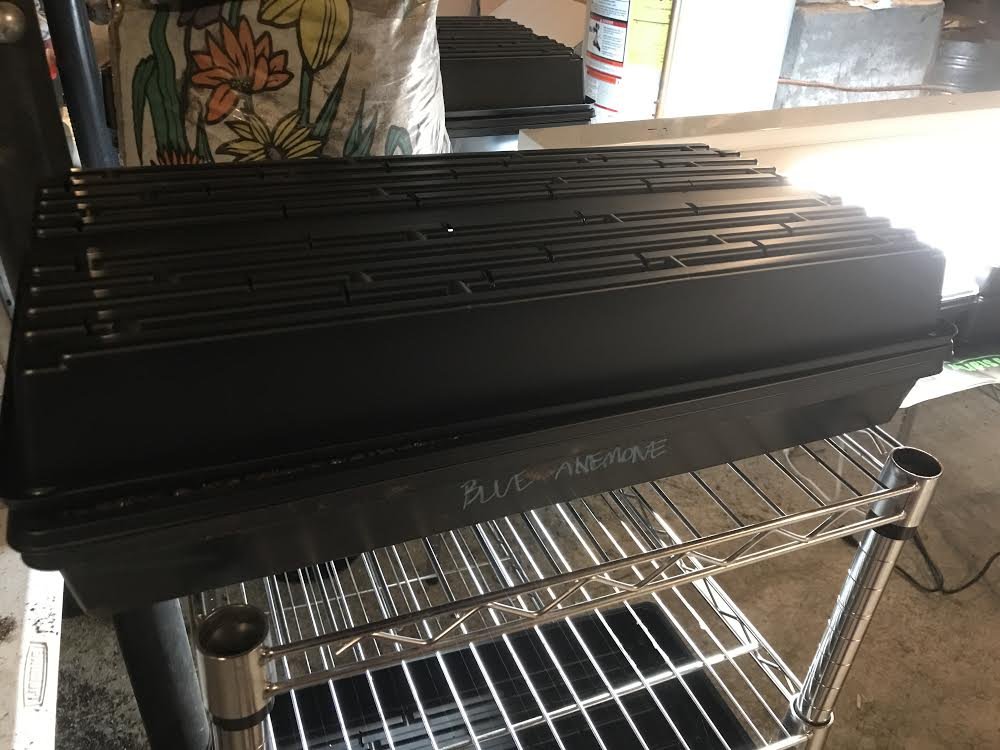
I filled up the trays and then sunk the corms, pointy end-down, into the germination mix. I put some extra germination mix on top to keep everyone tucked in. I put slotted 10-20 trays upside down on top as loose lids to help hold in some moisture while still allowing for ventilation, block out light, and keep the kittens away. The trays were placed on shelves in our fieldstone-walled farmhouse cellar-basement, which maintains a pretty consistent 50F.
Our simple set-up for anemone pre-sprouting in the cellar.
I checked on the corms every couple of days and made sure the germination mix had some moisture, but was not soaked. Occasionally, I added a little water from a pitcher-- I just poured a light snaking line across and down the tray. I looked to remove any corms that might be rotting (I never found any).
I started to see little rootlets on the corms just 8 days after starting them. This felt like a huge triumph after the previous year's botched attempt. Next, the anemones with 1/4 to 1/2 inch rootlets went into 50-cell deep-root trays to grow on in the cellar under grow lights until they are ready to be planted out in a low tunnel at the end of March/early April. I used a sharpie as a "dibbler" to make a small hole for each corm. I pushed them down about 2-3 inches in the cells. If all goes well, our anemones should start blooming early to mid-May.
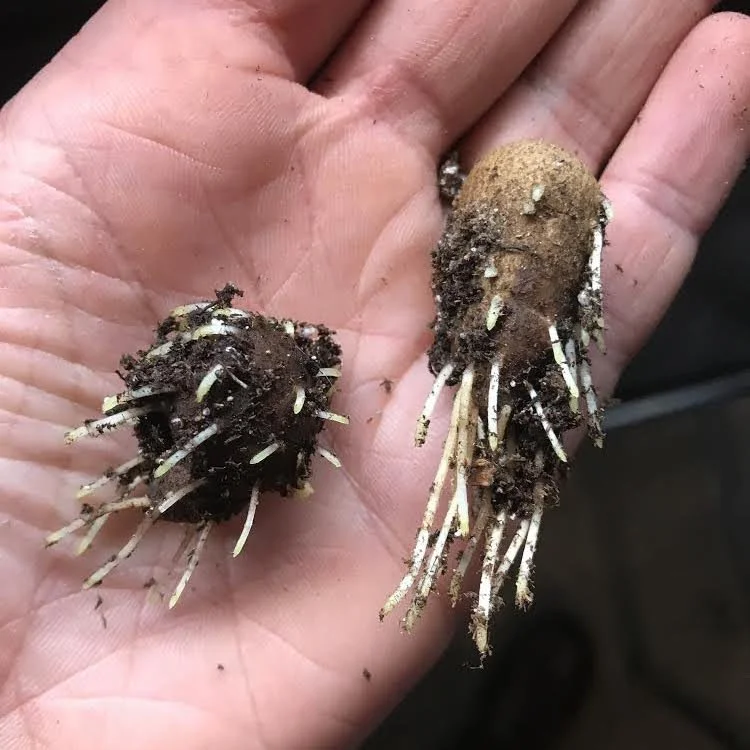
Anemone corms with rootlets on day 9 of pre-sprouting.
So- I'm here to say that anyone can do this! Anemones are so beautiful and they have a wonderful 10-day vase life. The are great for wedding floral design. And, while they are definitely considered a high end crop, don't let that intimidate you from growing them! Next year, we will drastically increase the number of anemones we plant and the number of varieties we offer, and we want to help lots of other new-to-flower farming folks take the leap and join us. Stay tuned or join the newsletter subscription to learn more!
We'll update you with the progress of our anemones again next month.
As always- if you have any questions at all, please don't hesitate to reach out via the comments section below, or Instagram, or email- whatever!
Best,